Quantcast
Channel: Affnan's Aquaponics
Viewing all 257 articles
Browse latest View live

Merdeka Merdeka Merdeka

$
0
0
Today 31st August 2014 marked 57th Malaysia Independence.
MALAYSIA TANAH AIRKU

Malaysia oh tanah air ku
Tanah tempat tumpah darah ku
Negeri elok amat ku cinta
Yang ku puja sepanjang masa

Sawah mu terbentang meluas
Tumbuh-tumbuhan hijau merendang
Bukit mu lurusnya terbentang
Tak jemu mata ku memandang

Sungguh indah di Malaysia
Negeri yang kaya raya
Tempat pusat berniaga
Terkenal di seluruh dunia

Malaysia negeri ku Malaysia
Pusaka tinggalan moyang ku
Tetap sentosa hidup merdeka
Malaysia tanah air ku


Merdeka Merdeka Merdeka Merdeka Merdeka Merdeka Merdeka

Going Straight Is Not That Hard - Closure

$
0
0
I was experimenting with Straight Siphon Outlet by using various reducer. I found that straight, though it work will require more water flow to start off. This more flow require is due to air within the siphon chamber require to be emptied gradually as the siphon about to start.


After experimenting with the above design, I find that to operate a siphon with lower water inflow an elbow is required as in photo below. This outlet shown below is making use of a 25 mm to 20 mm reducer which makes it more stable and reduce noise as well.


This particular outlet style I don't recommend any extension horizontally after this elbow it will cause the siphon slow to cut off due to water lock within this elbow to final water out. What happen as the elbow is during initial siphon starting, water drop down the tube will hit the elbow ad this cause temporary seal, gating the water out and at same time draw air out from above. As the air depleted from the siphon bell it will cause a flush since the gating effect will now draw water downward.


The 25mm to 20mm reducer is just to ensure the siphon is more stable at lower water inflow. Using a 25 mm tube all the way on this arrangement require more inflow, since "elbow gating" will require more water to creates.


This is a closure video of my Straight Outlet that I was experimenting few months ago. It was tested extensively and I find that though it work but it requires more water flow to start. This will make it dependent on water inflow.


The outlet in this video make use of a 25mm to 20mm reducer with a long neck to an elbow at bottom most of the pipe. This elbow form a water gate pulsing to emptied the siphon bell causing flush at lower water inflow as compared to straight flow outlet.

Its Technology At Its Best - My 31st Post on 31st August 2014 - Merdeka

$
0
0
I have been a blogger since 2006, the Aquaponics blog was up in 2009 after I had learn some of its basic and confident that it will be something good. My earlier photos and videos was done on a Canon IXUS V3 which was cutting edge technology at its time and bloody expensive for a 3.2 mega pixel camera that struggle to do VGA videos. Its price is equivalent to a Sony Alpha 6000 at present day rate.
My first aquaponics video was done on a Nokia E71 smart phone, its long gone retired to Tech heaven after serving very well as phones but not so much as a video recorder. Video below was done with this phone, it was my attempt to make known my siphon design to those that is interested in trying it out.

Time passed us by and more cameras, phones etc then most of my videos and photos were made on my trusty Panasonic Lumix LX5. It is capable of 720p video and good still image resolution. This camera give me the confident to get a good shot most of the time, but to get those photos on line is a hassle to do.
It is a good camera, but then Lumix LX7 were out however feature wise it is not worth an upgrade. Action cam GoPro Hero 3 Black is use mostly for my motoring shots, as a video cam it is difficult to use since it does not have a view finder or screen of any sort.

Above video was done with the Lumix LX5, it is a good camera and can do good video with enough time on each take. Along side this camera I did use a Nikon D5000 DSLR, but it is large and not practical to do video since it lack auto focus.

Lumix LX5 was my main camera to do most video and still until smart phones like the Samsung Note start to emerge in the market. I find that I am using more and more of the phone for my still shot and reserve only video to the LX5.

However things starting to head totally towards smart phones with introduction of Samsung Galaxy S5,  I find that not only it do satisfactory photos for blog post but it will do great video too. It has video auto focus and all the bang and whistle in a small package, photo compression, watermark and even a blogging apps that put icing on the cake.
I am not a fan of selfie but a phone holder on a tripod make this phone a good video capture device sufficient for my blogging needs. It small size and powerful features make it ideal for blog on the go and not to mentioned replying to email and facebook messenger send to me.

Video above was shot using the Galaxy S5 with audio from a Sony IC Recorder doing a voice over with Corel Video Studio Pro X6 software.
Technology has change so much over the last few years, it is just like yesterday that I still can recall my first computer the ZX81 by Sinclair with a whooping 256k of memory trying to programmed for a few hours making dot to cross the TV screen.

All this technological advancement is good, and I'll try to use it to make better blog and give easier to understand video and blog post.

Cheers

Brief Overview of My Setup 1st Sept 2014

$
0
0
A quick overview of what I have around the house, I try to utilize as much space as I have and hopefully others may learn and start the same to help green our urban landscape.


Video shot using Samsung Galaxy S5, audio with Sony ICD-AX412F IC Audio recorder and editing done on Dell PC with Corel Video Studio Ultimate X6 editing software.

Thanks for watching

20 mm StrainerBell Installation Instruction

$
0
0
This post is showing how the 20 mm Strainer Bell Siphon is install to a typical growbed, it is a straight forward installation and video instruction is at the bottom of the page.
Step 1
Make a hole in the center of the container, a 26 mm hole required for a 20 mm StrainerBell. The second smaller hole is optional for water feed.

Step 2.
Get hold of the stand pipe and ensure that it has two black rubber seal and a gland nut. Remove the gland nut and one of the seal.

Step 3.
Install standpipe to strainer guard and follow with the removed seal. The seals must be on both side of the strainer guard.

Step 4.
Install the standpipe assembly to the growbed.

Step 5.
Secure tightly the standpipe using the provided gland nut, there is no need for a seal on the underside of the growbed.

Step 6.
Install standpipe extender to adjust water level as needed.

Step 6a.
Additional extender provided to adjust for thicker growbed. You can cut extender to suit your growbed height.

Step 7.
Install media guard to strainer.

Step 8.
Put the end cap on the siphon top, this can be done last and do not jammed this end cap otherwise it will be difficult to remove. Hand tight will do just fine.

Step 9.
Install siphon outlet to the underside of the siphon.

Step 10.
Hand tight will do, and the parts can be swap to get the best out of your installation. The illustration below is a baseline installation that work for most setup.

Step 11.
Complete, this siphon is made for growbed from six to twelve inches in height and it can handle a 4' x 6' growbed size without problem, no alteration needed to be made on the outer media guard for different growbed height. The extender need to be adjusted by using different size or by cutting it to length.
Video of the installation follows.

Ornamental Aquaponics Set - 2nd. Prototype

$
0
0
After more than 6 month trial of the 1st prototype, today a second unit was made. It is using plastic pot as the fish tank which is larger than earlier porcelain pot.
This set will be further tested for few more months then I will make it for others. That stand is temporary, final product the stand will be outside the fish bowl.
Filling growbed with LECA, before letting it cycle.
Siphon media guard cut to length with extender adjusted to get water level below LECA surface. Water inlet is a simple 15mm PVC piping with 1000 liter per hour pump feeding the set. Water head is about two feed that reduce the pump capacity to about 800 liter/hour.
First and second prototype, undergoing actual test to ensure trouble free operation. Ideal small unit for apartment, condominium, town and link houses. This set is also suitable for growing Strawberry using aquaponics method.

KLIA Solar Farm

$
0
0
Happen to pass by this area at the back road of Kuala Lumpur International Airport (KLIA) which has rows upon rows of solar panels.
These panels are for the airport lightings, I believe it is for the taxiways and guidance lights which requires 24 hrs light up.
Anyway it doesn't matter as long as they are saving energy it must be good.
Wish I could have something like it, even at a home scale to power up my aquaponics.

Sponge Bob Square Pants

$
0
0
Received few sponge and net pots yesterday from Thailand ordered from ebay and good time to sow few more seeds.
Use this sponge with precut holes ready to accept seeds. I do egg plants one in each sponge and strawberry, few seeds in each of the sponge.
Strawberry seeds above was kept in the freezer for two weeks and I took out a few to sow.
To try out, those strawberry seeds I use sponge with net pot and for egg plant only sponge. Both I place in the new ornamental set that I'm testing. No nutrient yet in the system. I place one starter fish and dissolve few table spoon of organic chicken manure to get system going. We'll see how's this sponge do and whether the strawberry seeds can germinate.

Equatorial Lowland Strawberry Project - Journal 6th Sept 2014

$
0
0
Few of the plants didn't make it after three weeks they died, four pots in all. Redo the plants, fill up one growbed with six pots and the other growbed left a couple to let them produce runners.
It's easy because I have the plants in pots, just remove from one growbed then replant to another. This way plants experience minimum transplanting shock. The pots I lower it further down to get as much water as possible to the roots.
The three pots was taken from this growbed which I left two since they are producing runners. Three runners produce from each of the parent plant. I will put those into pots to manage and transplant to another growbed.
This is how the runner looks like after about 2 weeks, with roots forming. Eventually all original plants will be replaced with these runners and then I will try to get them to grow.
More runners, this small with roots not established that well yet.
Another with more roots forming.
Parent plants with runners drooping down once the pot are lifted up.
The two parent plants each has three runners, removed from growbed for a redo. If it is not potted no way I can remove without damaging these plants.
Same runners planted to pot within the growbed. Once it has established I will move them to another growbed to start producing runners for that growbed.
With this style of planting, the runners has more chance to survive and they experience only minor transplanting shock.
Propagating Strawberry this way is so easy to do.
All these pots are not to be disturb otherwise the roots will not hold and plant may die, just leave them for another three weeks before doing any major work in the growbed area. Wait for them to produce about 5 or 6 mature leaves before cutting them from parent plant.
Only one runner not potted, because the umbilical is too short, I just let it grow next to the parent pot and once bigger, I'll transfer to pot after cutting it from the mother plant.
These Strawberry multiply very fast, and I guess all my growbed in the front will be fill up with strawberry plant before end of the year.

That's it for the time being, will update how these Strawberry doing in my Equatorial Lowland Strawberry Project.

Fresh Water Red Claw

$
0
0
Visited nearby aquarium shop to get some fish for my Ornamental Set Prototype No. 2, so happen that this place stock many of these Red Claw Crayfish of various sizes. Price range from Rm 4.00 to RM 10.00 each. The smaller one at RM 4.00 is a good buy, but I refrain from getting any because I am not prepared for these yet.

Below are just some photos of those Red Claw for show.


Slotted Pots - For Potted Flood & Drain Aquaponics

$
0
0
Starting to do more of this potted flood & drain style of aquaponics since it is very convenience and use less LECA. There are pros and cons for doing it this style, however for smaller plants it is ideal and could be one of the best way to do it.
Slotted pots, not sure whether it is a net pot or not but its look good for what I going to use it for. At Rm 2.50 each,  they have slots that is better at draining away water and root growth.

Update : Just found out that these pots is for Orchid plants, so they are Orchid Pots.
Six inches across with no other sizes available from nurseries at Selangor Green Lane, for what I am doing it is sufficient.
Compare to the normal plastic pots, these has more holes and it is just nice for LECA since the slots are narrow but many it will give good drainage.
Just nice for LECA
These are not recommended for large plants, most leafy greens is okay.
Doing one Strawberry since yesterdays almost all I had redo to pots. I'll use this for future potted flood & drain style aquaponics.
Now just wait for these to grow.

Equatorial Lowland Strawberry Project - Journal 11th Sept 2014

$
0
0
One of the growbed that was full of mint redo and clean all the roots out, this growbed going to be the next area where Strawberry going to be in.
All the mint were cut last week, today the roots are removed. If not removed they will decay and cause the system to swing towards acidic, it could be a good thing for Strawberry but I feel it's best to start from a known baseline.
The single parent plant from this ornamental set is removed and potted, I takes my chances by cutting the runners from the parent and letting them grow on their own. I will know tomorrow how many survive being independent. Six in all, these are all new plants.
Potted the parent plant in 6 inch net pot and it will be replanted into a bigger growbed.
I scoop some LECA along with the roots so that it will experience less of a shock, topping up with LECA from matured growbed.
Growbed is flooded by using a taller extender, this makes it easier for getting out the roots and level the LECA.
This parent plant placed in a central position of this growbed so that it can start to colonized this entire growbed with runners. I'm giving it ample space to reproduce.
The plant is raised from LECA level to give it good drainage, I'll monitor it closely this next couple of days to ensure it survive the replanting. I try not to give any shade and let it expose to full sun and see what happen.
So far this trial of planting Strawberry looks promising, until it can produce fruit only then we'll know whether it is successful or not.

Potting Garlic Chives - Kuchai Redo

$
0
0
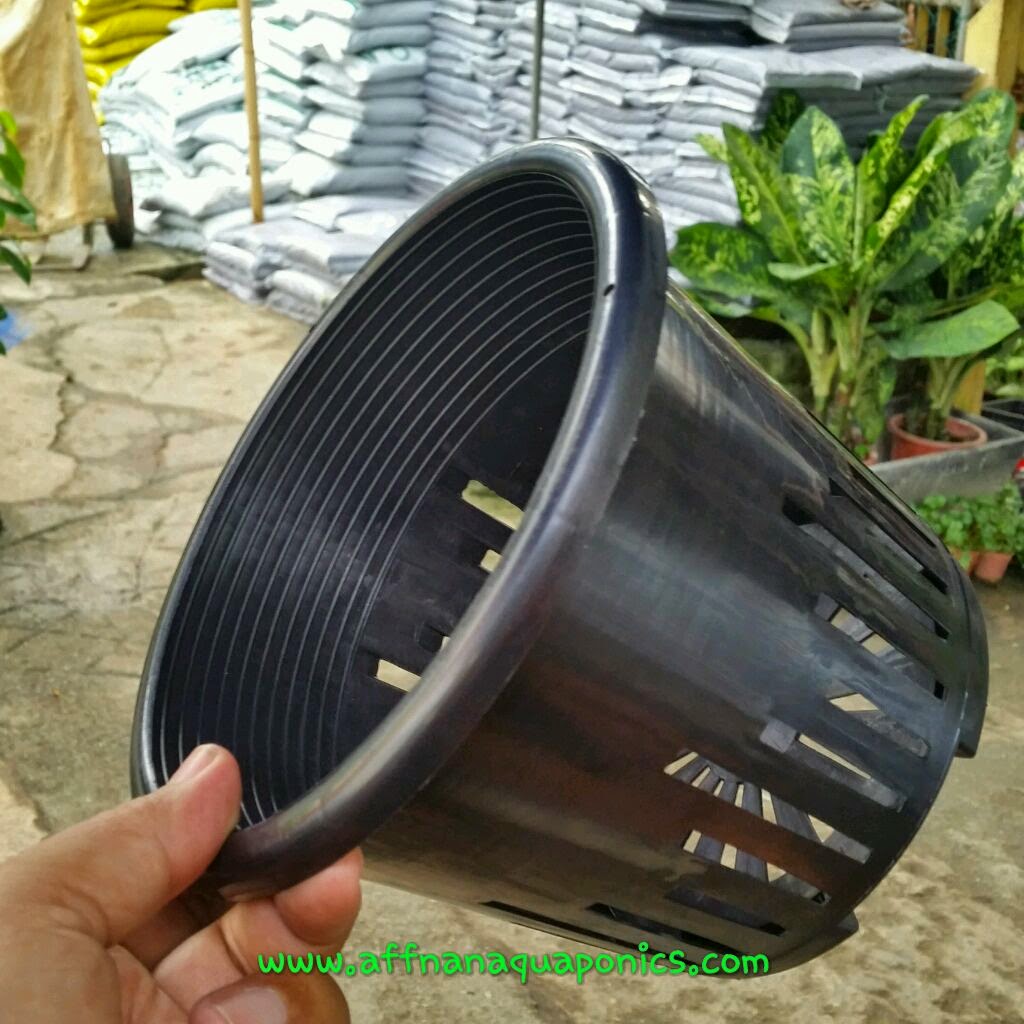
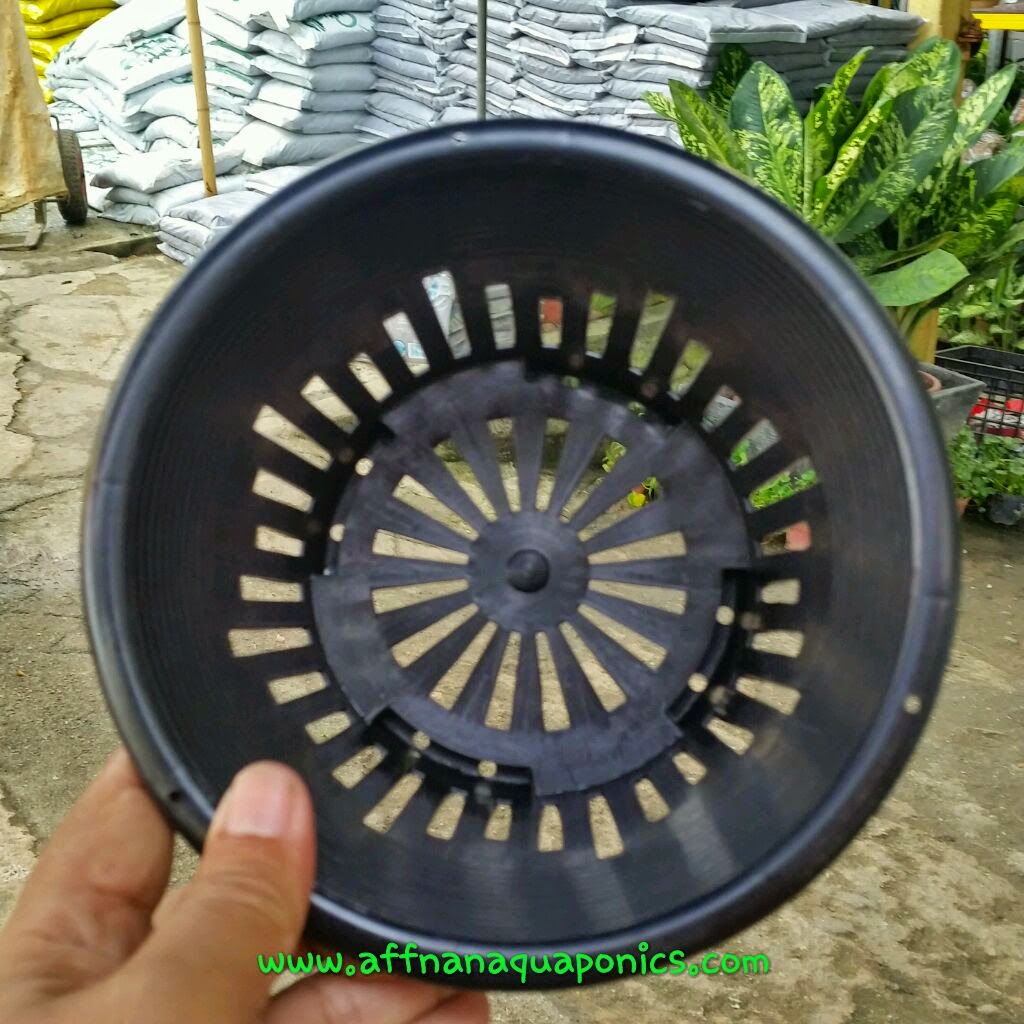
Since I am doing most of my planting in pots, these Kuchai plants is no exception. I had to put them in pots so that it can be easily contained and transplanted elsewhere if needed. I use those slotted pot which is great in water drainage and just nice for LECA.
Garlic Chives thrives in Aquaponics and its more than enough for a small family consumption on a 3ft x 2ft growbed. In fact 1 square feet is all that is needed for an average household. So decided to transplant these to individual pots later I can decide what to do with it.
As above photo they grow really well in LECA, and made it easy to redo this plant, all I had to do is gently pull out the clumps and they will all come out.
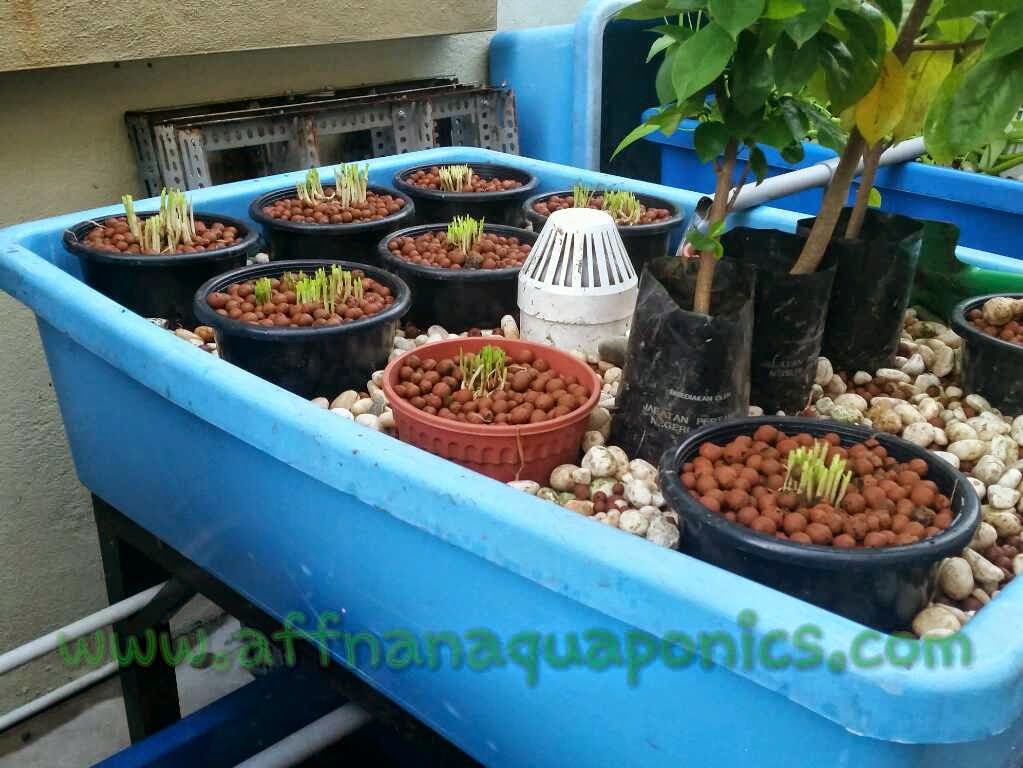
Root ball and all, can be easily lifted out of the growbed.
They have shallow root, so it is not that invasive to the siphon like mint of some other plants making this Garlic Chive ideal on a media based siphon flood and drain aquaponics growbed.
Put all in the slotted pot with some LECA at its base.
Some of the pots I put two clumps like photo above otherwise I would run out of pots.
Filled up with LECA and just wiggle a bit to give it a snug fit.. and all done.
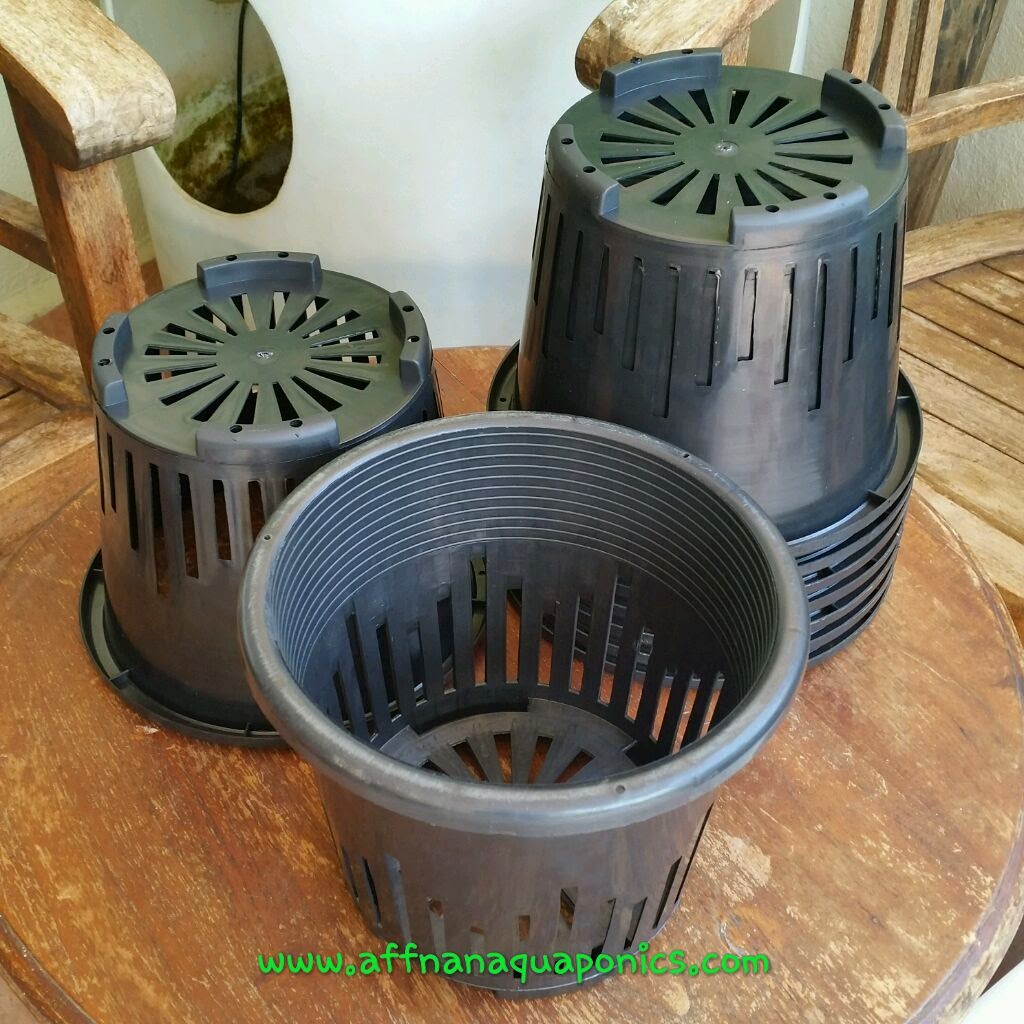
That's three pot awaiting to be placed in the growbed.
Smaller clumps I put two to a pot like these above.
These Chives multiply by rhizomes within few months it will spread outward from center making the clumps bigger. Few of these I planted from seeds and some from nursery bought plants.
All plants out, and it only takes about 30 minutes to do, since I am using pots the water level in the growbed were adjusted to a lower level.
Chives don't need thick growbed, six inches is more than enough.
Altogether 17 pots, the photo is a bit grainy due it's getting dark.
I planted eight pot in the existing growbed and left with these nine pots to be place in the back lane CRAFTS set.
Nine left are placed in my back lane set


Affnan Aquaponics

Equatorial Lowland Strawberry Project - Journal 18th Sept 2014

$
0
0
To get healthy Strawberry plants they requires strong roots, to get this the plant need to direct most of  its energy toward root growth. During first year of planting don't let the plant fruit.
All these flowers need to go, and it's best to clip them off at earlier stage that this.
Runners like these above also has to go.
So flower buds has to be clipped.
All clipped so that the plants can concentrate getting good roots.
Runners clip to prevent new plants, I reserve two original plants to produce runners for propagating. Those plants are the base stock for my Strawberry plants.
I will let the plants grow for this next few months towards January or March then I'll trim all leaves to get new growth.

Affnan Aquaponics

Potted Media Water Level

$
0
0
Slotted Orchids pots that I use for growing made it very convenience to adjust water level. Since some plants require different water level, with individual pots it can be adjusted to suite the plants that in it.
These pots has good drainage and I can easily adjust its level within the growbed to suit what ever I plant. This pots are about 6" across, therefore larger plants will not be suitable.
Shallow roots plants like Strawberry, Chives and leafy vegetable is best to use these pots. At certain stage of their growth water level may need to be adjusted to ensure they grow. Especially after transplanting where water level are normally set to high. With many plants in a growbed, adjusting the growbed water level will affect all plants in it.
Having individually potted plants in the growbed, it then can be position higher or lower within the growbed to get water level as required.
Strawberry as above was just transplanted, so the water level are adjusted to be high with pots burried deeper in the growbed.
Plants like Chives, above don't require high water so I adjust the pots to be higher up making the water level relatively low.
Above is a simple illustration on what I do to achieve different water level for individual plants within same growbed. This I find easier to do since pots containing the plants can be lifted without stressing the plants much.

Affnan Aquaponics.

Titbits- 26th September 2014

$
0
0
Not much happening this last few days, just tidying up and get few plants reorganized to other growbeds. Kuchai (Garlic Chives) plants has to make way for the Strawberry project experiment, and all pots has to be placed in the back part of the house.
Harvest all Kuchai and remove the pot from this growbed. Quite a lot of Kuchai and gave it away to neighbors.
The Ornamental set metal stand is ready and I am testing it out before making more to sell.
Unfortunately the pots are from different manufacturer, hence the color difference. Oh well it still function same and I'll wet run this for another couple of months then let one set as a test piece and permanently get it going to see if any problem arise after prolong usage.
The strawberry plants still producing runners, I clipped most of it to let plants grow stronger. There are still a few that I let grow into plants and use it for new growbeds. I'll replace those older plants that originally obtained from Cameron Highland.
The older Strawberry plants never stop flowering, most of it I clipped too. Only one or two were left to develop into berry.
This one fruit that I let grow, okay it's not as big but at least it a good sign that we can have strawberry in the Equatorial lowland.

That's about it today, still a lot more to do getting the setup organized and tidy.

Equatorial Lowland Strawberry Project - Journal 27th Sept 2014

$
0
0
Looks good so far these Strawberry, finished making shades to the second and third growbed. The forth I left it temporarily vacant since I decide to put more plants within each growbed. This require me to let some of the plant to developed runners into young plants for the vacant growbed.
This time I use the electrical conduit PVC, they are cheaper and since the frame doesn't require much strength to hold those netting, it's okay.
Apart from direct intense sunlight it is good for heavy down pour which if not protected from will damage plants. Those that are not familiar with Equatorial weather, what we have here is either very hot sun with high humidity or very heavy rain which pour cats and dogs. Either way you're screwed.. if no shades provided as protection.
It's time for one of the runner to be cut off from the mother plants, it has form much needed roots and should be able to survive on its own.
Cut the umbilical as close as possible to the mother plants so that she don't waste much of her energy trying to repair what is not important anymore.
Make another cut as close to the young plant, this plant can be left where it is. However in this case I need the space for another fresh pot since there is another runner developing and I want that to form into new plant.
That new plant I transfer to a nursery growbed, here the water level is adjusted to be high so that any new plants will have a head start in this hot weather. Once it has formed more roots I can then move it to the 4th growbed as a permanent home for it.
The mother plant was in the old plastic pot, changing it to the slotted pot will ensure better growth as roots formation is found to be better if there are more exposure to air. Before letting it produce another plant, it is best to get the pot change.
It's a quickie job and not much stress on the plants since we are doing it the Aquaponics methods. This is one of the original plants from the highland, so it's good to see that it had survived the heat and even producing runners as above.
Back in its place, and one fresh pot standing by to catch the runner. I will need to trained it to be somewhere within the pot, using pots it is convenient to rotate the plant positioning the runner to a good landing. If this plant is directly in the growbed it will then be difficult to do.
One lone Strawberry is turning red, this is the one plant that I let it to fruit. Most of the flower I just clipped away but this plant I let it be. Just to see what developed from this experiment, 1st year plants need to get their roots strengthen first before they are allowed to flower other wise it may not be strong enough to bear fruit in the hot Equatorial climate.

Taste Test - Start To Finish

$
0
0
On 10th Sept 2014 this plant I allow the flower to develop to see what happen, whether it can bear fruit in this hot lowland. 
To get the plant flowering is great news for me since as a known fact that Strawberry will have difficulties in flowering if exposed to temperature of greater that 28 degrees C.
On 21st September 2014 it form fruit and I was anxious to see its progress.
Not as large as the highland but to get it fruiting is a joy to see on 25th September 2014
Slowly changing color to a reddish pinkish Strawberryish.. :)
And finally today 28th September 2014, pick it for test taste.
Nice and firm, but should have waited another couple of days before picking.
 Not the usual Strawberry shape, may be due to this particular cultivar it is like that.
The flesh is firm and not watery as most Aquaponics, what ever it is I am overjoy for this and can't wait for next year when the plants are fully ready to bear fruits.

So it took 18 days from flower to picking time, more or less.

Equatorial Lowland Aquaponics Strawberry Project - Facebook Pages

Lemon Grass in Container Flood & Drain

$
0
0
Serai or Lemon Grass is a common herb to most home gardener even in temperate countries where they would grow these indoor during the winter months and take it out in the spring. I did grow these in my growbed before back in 2010 or so but it just got wild and difficult to contain within my growbed.

This time I want to do it differently by using the slotted orchid pots, hopefully it can be "tamed" to within the confinement of the pot. Got myself few stalk of lemon grass which is easy to get and just let it stand in a bowl of water for couple of hour or so.
Since I'm doing it Aquaponics, a couple of hours is sufficient and don't need to wait for roots to form like when you are doing it with dirt.
Three pots and using some surplus hydroton and pebbles mixed as grow media I prepared six stalk for planting.
Two in each pot, just in case one didn't make it. But it is highly unlikely for this not to grow. Over here this is easily grown anywhere.
Placed the pots in the growbed and just wait. Ideally for this plant it is best to get a larger pot like twelve inches across, those pots is only six. I'll get a bigger pots once these shown good progress, on average Asian household we probably can make do with two pots of these for our daily cooking needs.
Viewing all 257 articles
Browse latest View live


Latest Images